Gun Recording (Day Two)
Lately I’ve been busy with a lot of Field Recording and I haven’t really had much time to update my site with anything that I’ve been up to. So, here’s a highlight from one of the recording sessions that I recently finished.
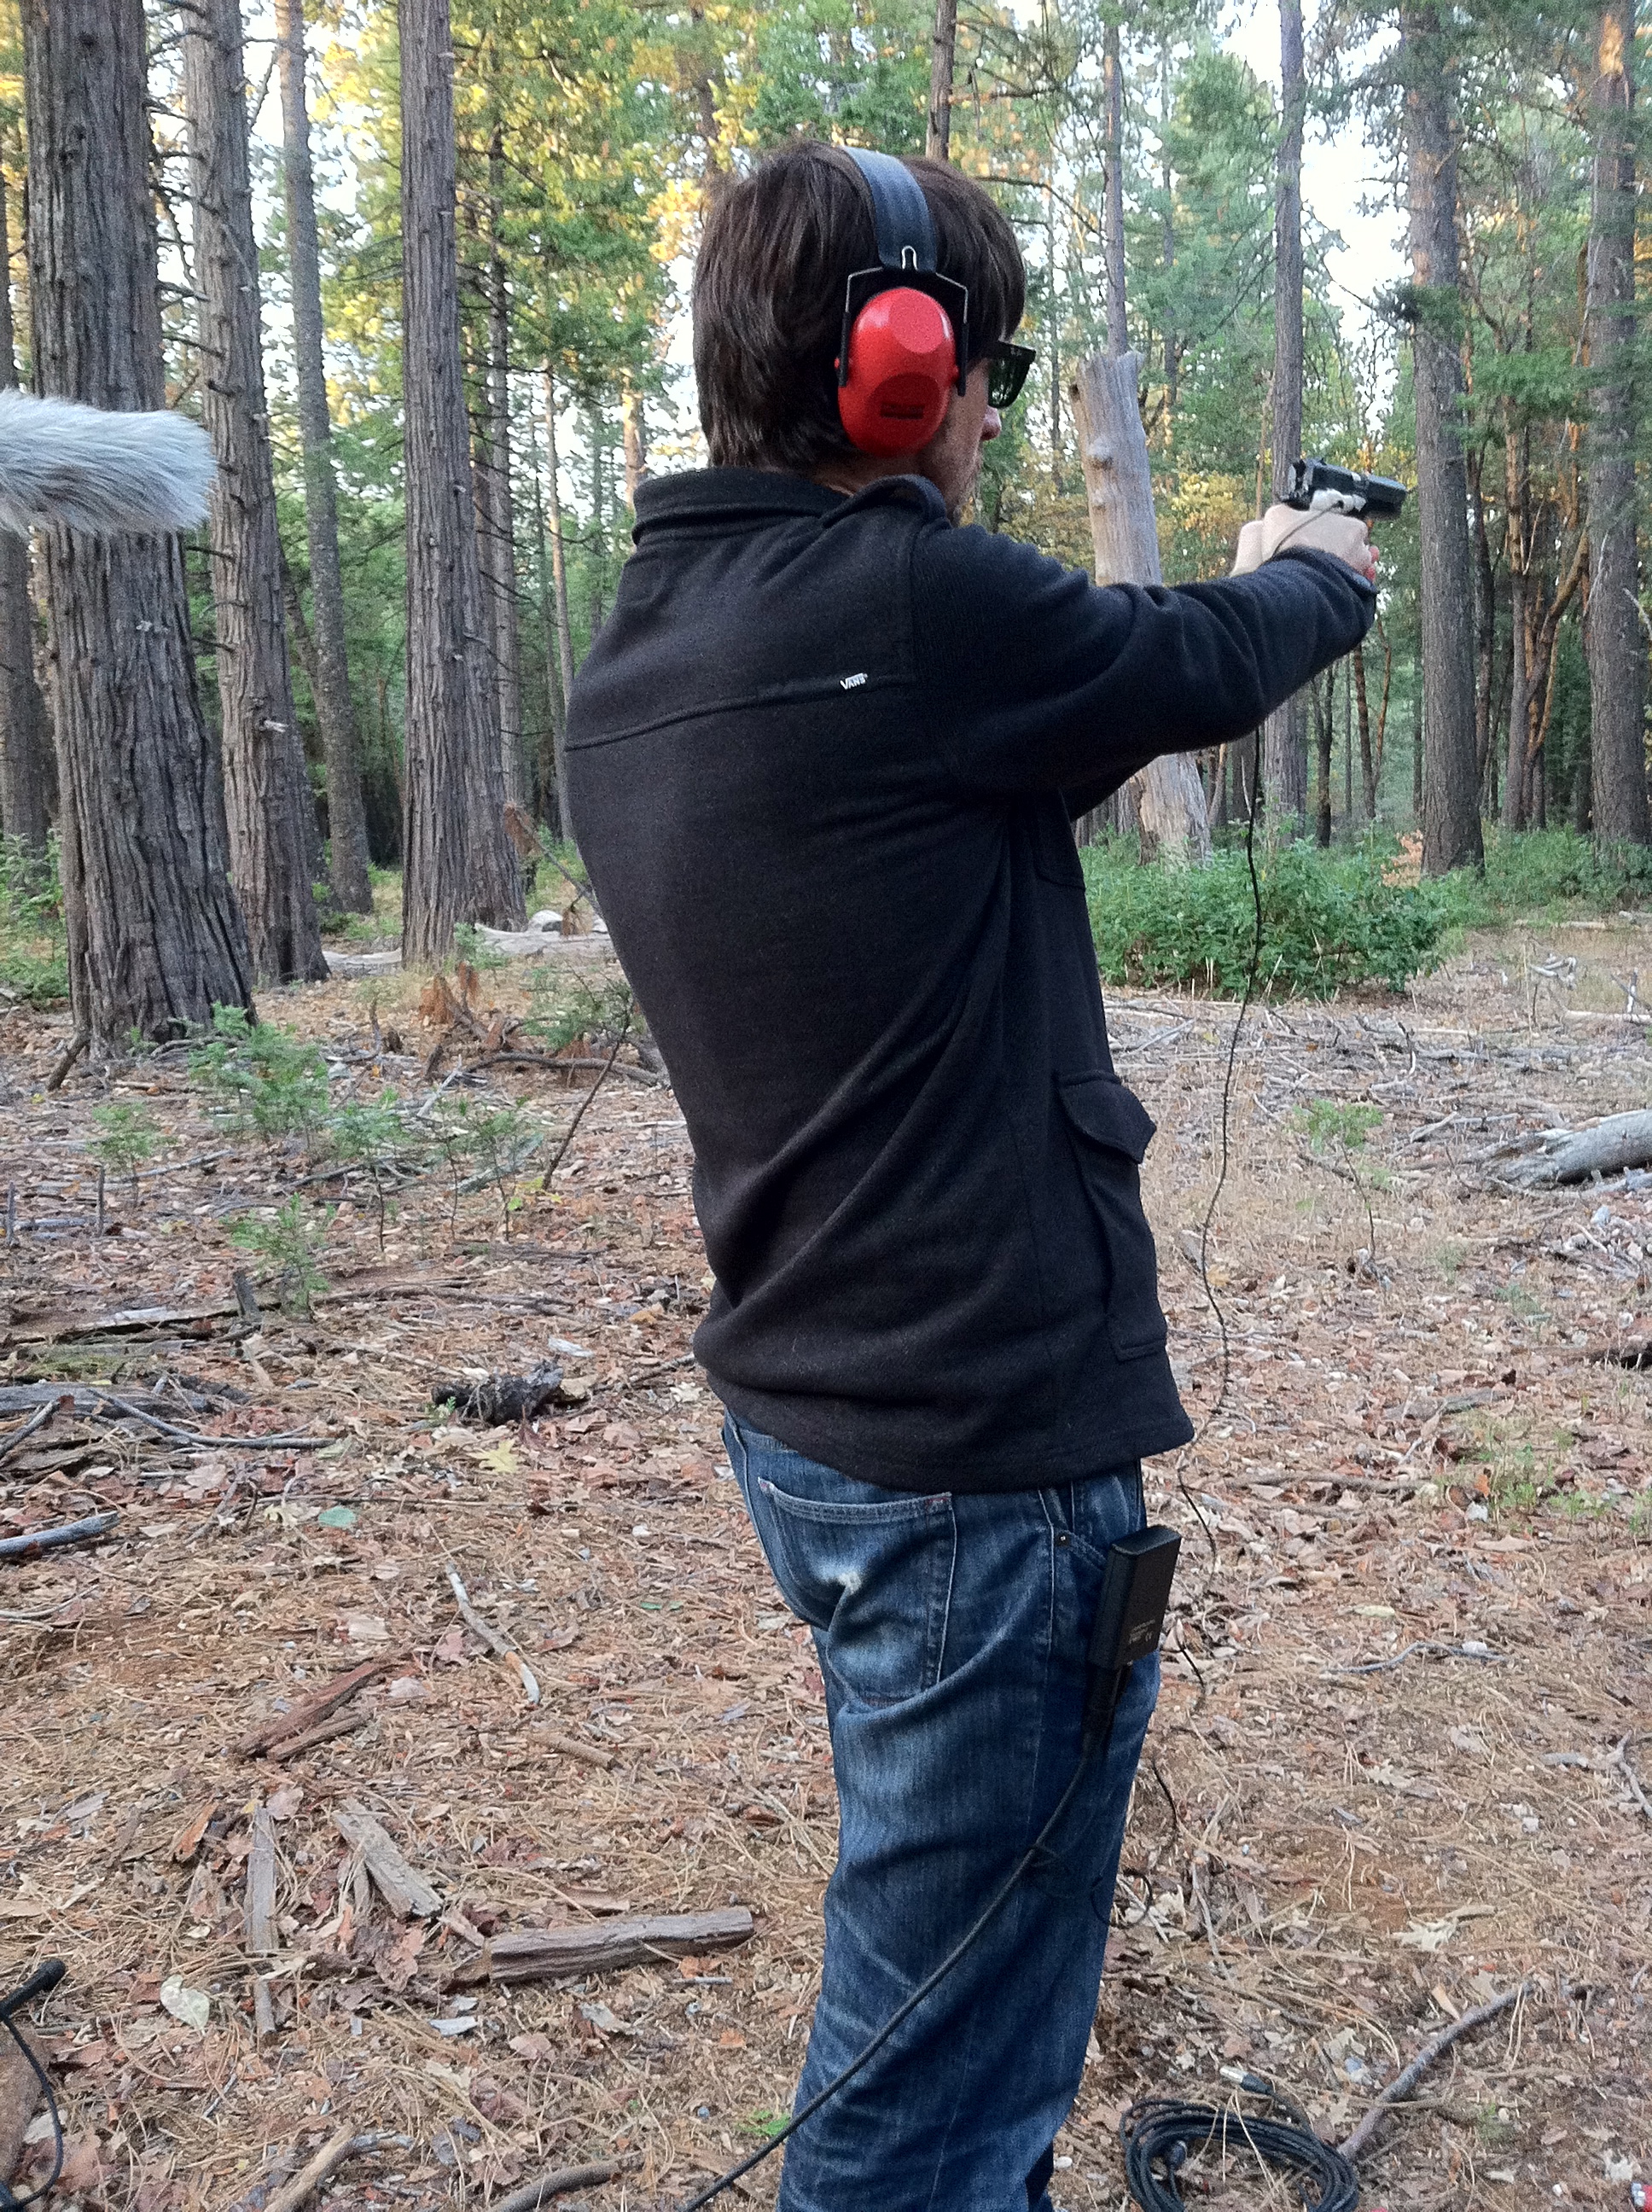
Me shooting a 9mm. You can see the lav’s cable hanging off of the gun if you look closely. Click on the picture to make it a little easier to see.
Gun Recording Session two:
On 10/27/13 we set out to record guns for the 2nd time. Our 1st effort wasn’t a failure but there were a number of things that I thought we could improve on (I will write a full article covering all of the gun recording sessions when I have a little more time). During our 1st recording we had a total of four mics set up to capture everything. An X-Y configuration was set up behind the person shooting and there was also a mic and on both the left and right-hand sides of the gun. That setup gave us a pretty good sound but I’m always determined to get the best sound possible, so we increased the number of mics being used and changed the placement of them a little bit.
During our 2nd session we were also down to only two people. Our 1st session on 10/13/13 included Alex Lockett, Adam McGinty and myself but Alex wasn’t able to make it out on this 2nd outing. We decided on using an X-Y stereo mic behind the shooter again and the Rode NT4 was a good choice for that. A Rode NTG-2 was placed on the left-hand side of the gun and then an Audio Technica AT835b on the right-hand side. So far this is fairly similar to what we used for our 1st recording. We did aim the mics on either side of the gun a little differently, but otherwise these mics were placed nearly the same as the 1st time.
For the 2nd recording I wanted to try a few different approaches though. The first thing that I wanted to do differently was to include a dynamic mic to our configuration and set it up really close to the gun, since it would be able to handle a much higher SPL than the condensers could without distorting. This was a somewhat last minute idea and I only had a Shure SM58 at my immediate disposal, so I brought that with us. We set this mic up about 1 to 2 feet below the barrel of the gun (this varied from gun to gun of course) and aimed the mic upwards at about a 45 degree angle between directly up and where the barrel of the gun was pointing. I’ve never read about anyone doing this before, although I’m sure that someone has. Before I talk about the last mic that we used you can click on the image below to get an idea of the overall setup that I’ve described so far.
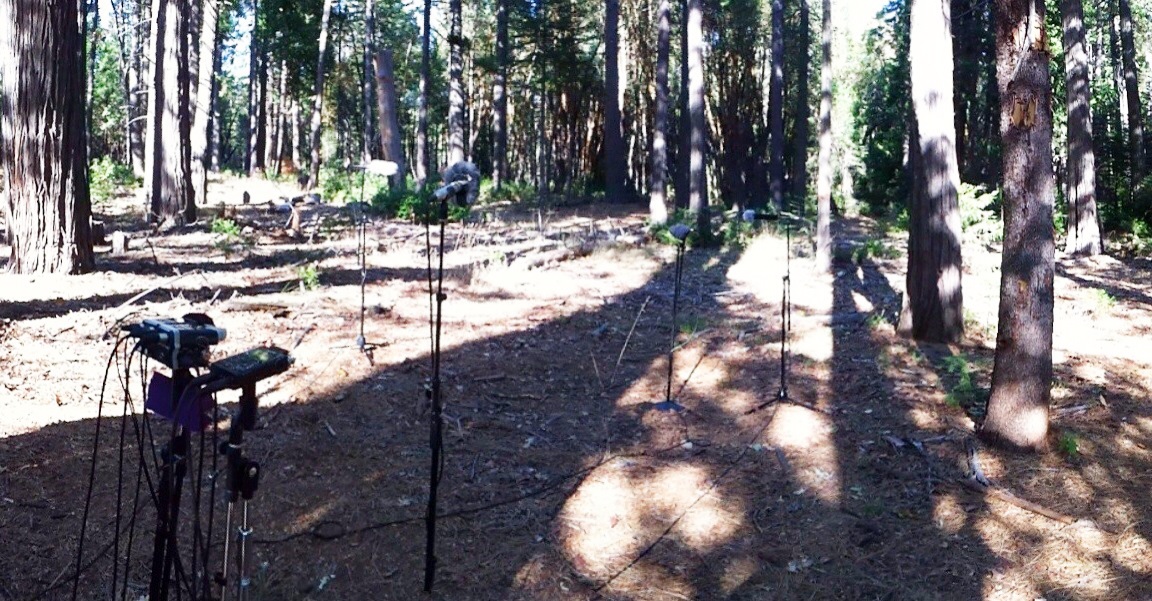
Here is the mic arrangement that we used. Clockwise from the back you can see the NT4, the NTG-2 (far right), the SM58 (slightly off-center to the right) and then the AT835b (on the left). You can see the lav in some of the photos that are below. Please click this image for a larger and better view.
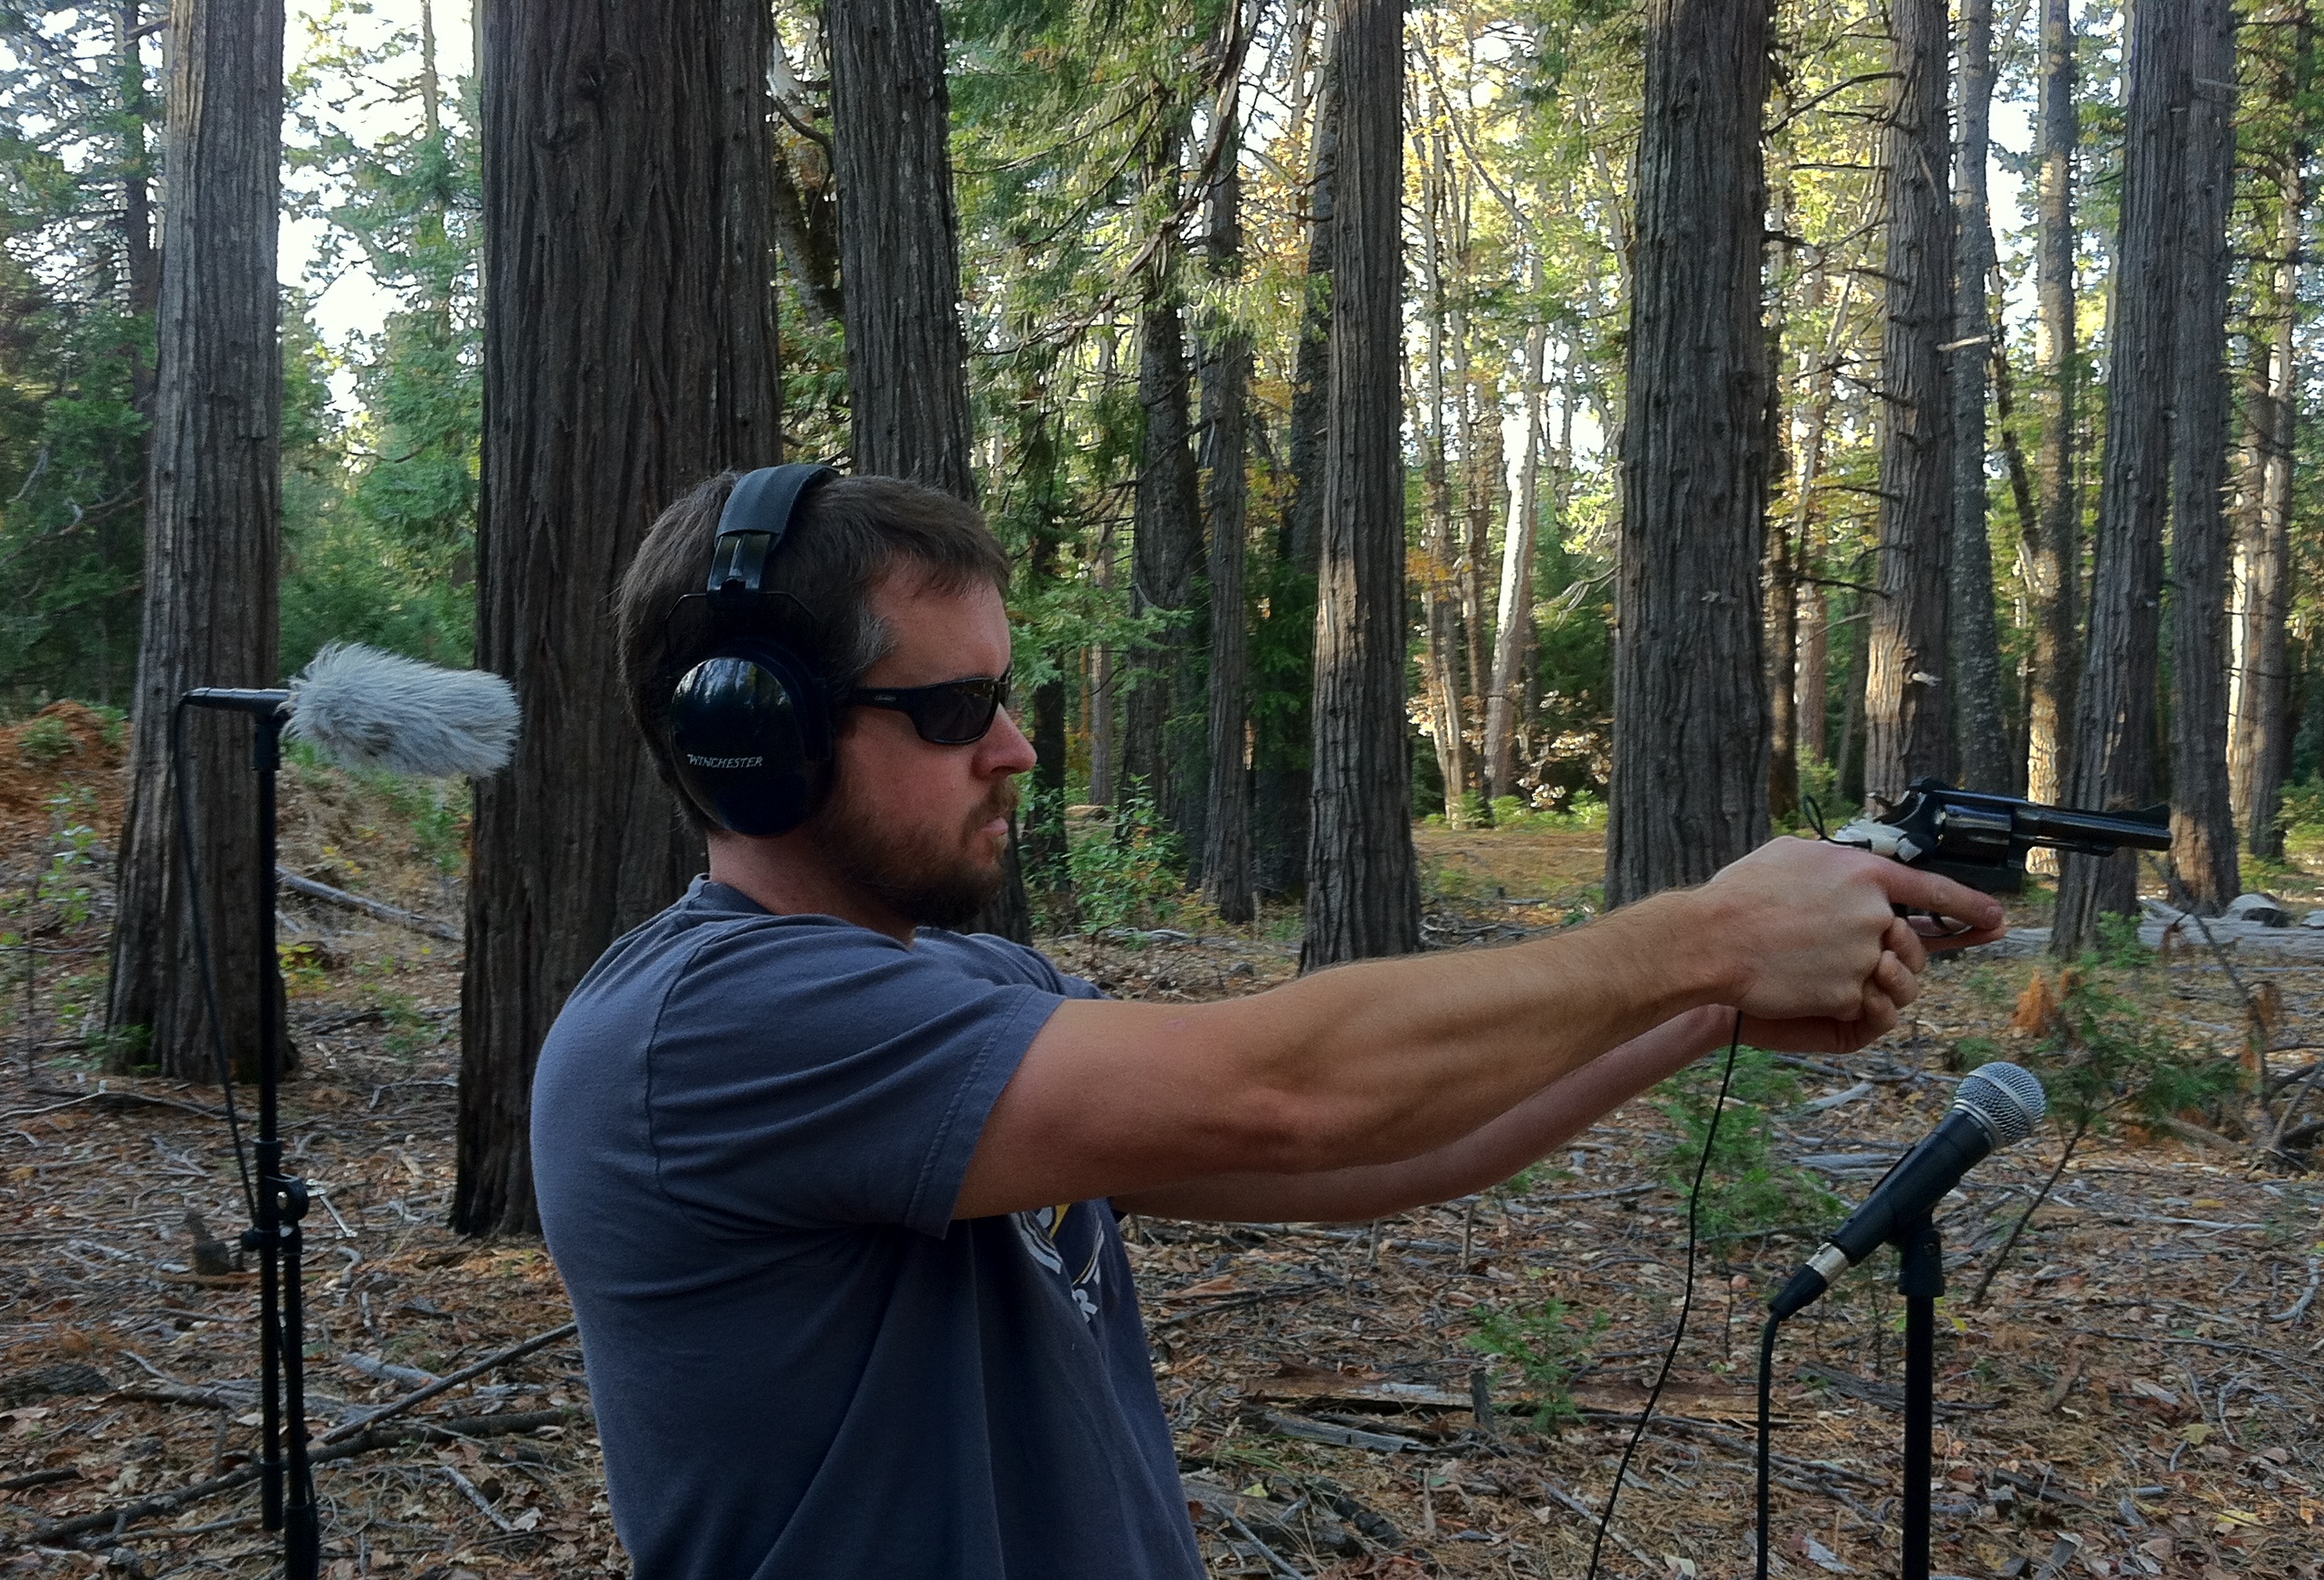
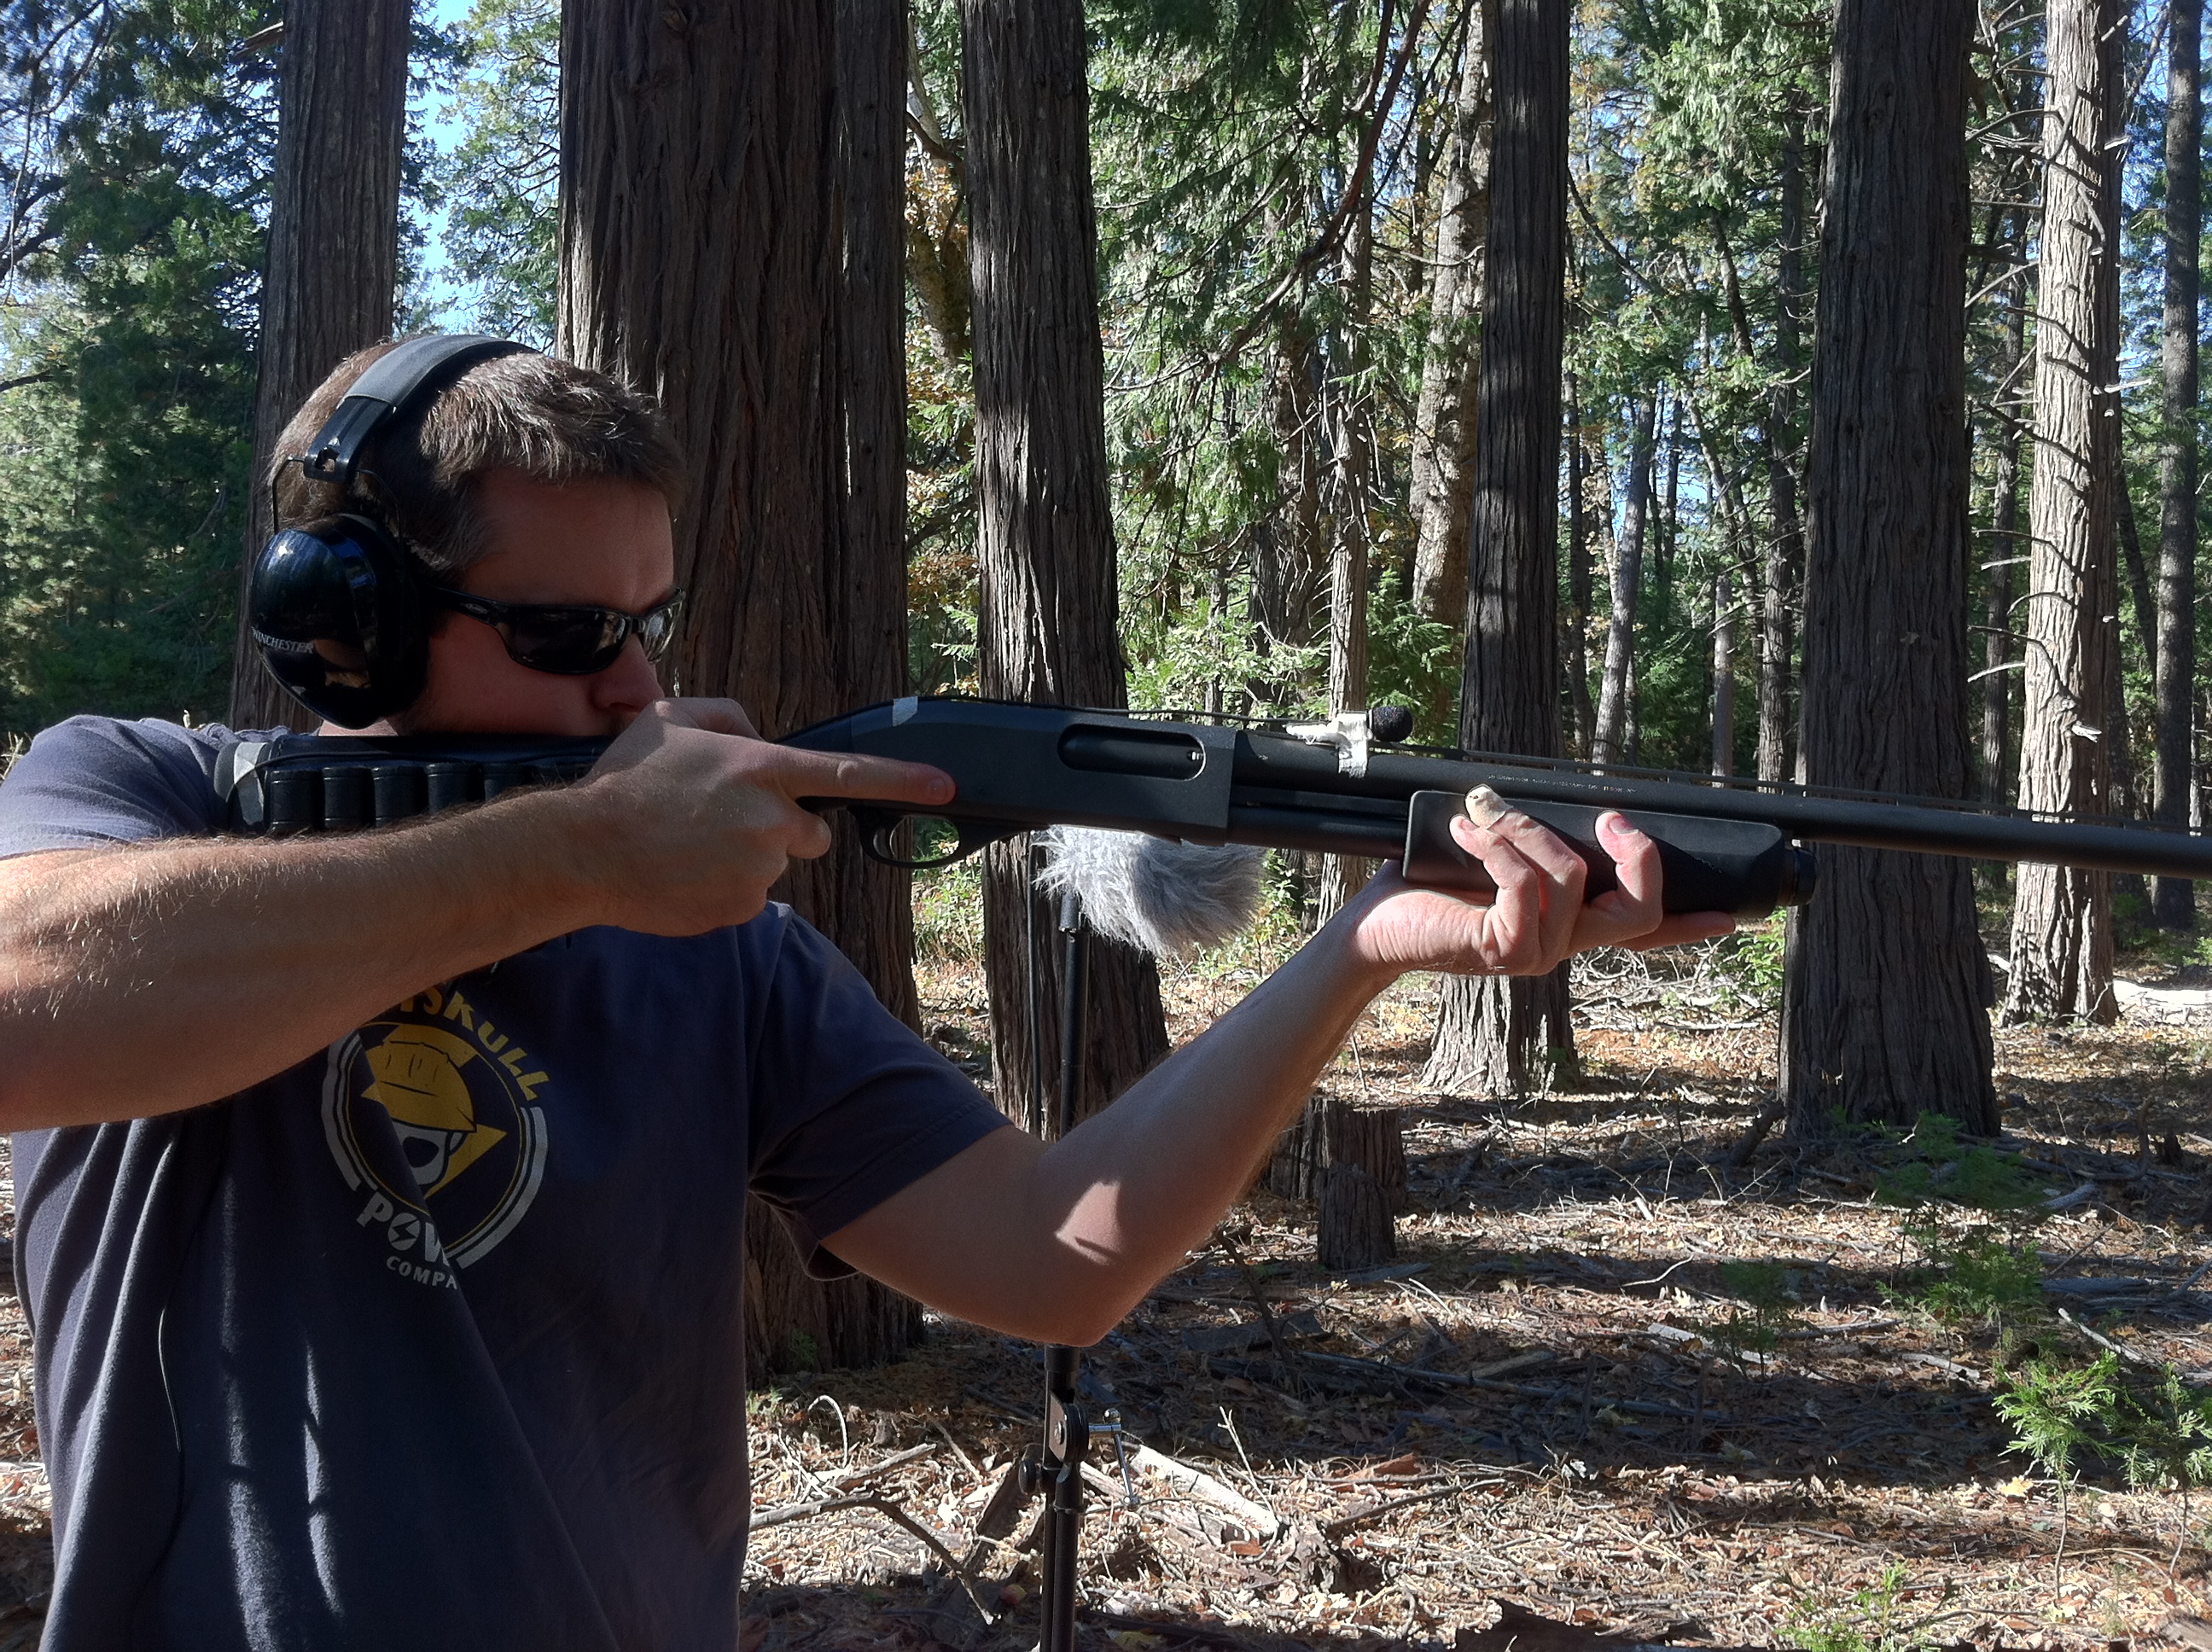
Another idea I had that was different from our last recording was to use a lav mic and either attach it to the gun directly or clip it to the shirt of the person shooting, depending on whichever worked the best for each gun/scenario. With all the various guns that we used we ended up being able to affix the lav mic directly to each gun, which was pretty exciting since that puts it directly on the gun instead of being a foot or so away. I wanted the lav to be as close as possible to the internal explosion taking place inside the gun being used. I didn’t know what this would sound like but it seemed like a good idea to try out and it actually ended up giving a very mid-rangy and punchy sound that I really liked. It also did a good job collecting all the mechanical sounds, such as when we were clearing the chamber of the shotgun. The mechanical sounds are hard to get a clear recording of outdoors (because of all the other sounds that are taking place around you) but with a mic actually attached to the gun the mechanical noises sounded very clear and articulate, despite the fact that they were recorded outdoors. While I’d still like to record all the mechanical sounds back at a studio, the lav did actually get some pretty usable sounds.
Overall I’m pretty happy with all of the sounds that we recorded during our 2nd gun recording session and I’ll be posting up all of the audio fairly soon. Time has been very tight lately with all the various projects that I’m currently working on but I’ll try and post up some clips as soon as I can. Until then check out some of the pictures below to see some of the guns that we recorded, etc. Enjoy…
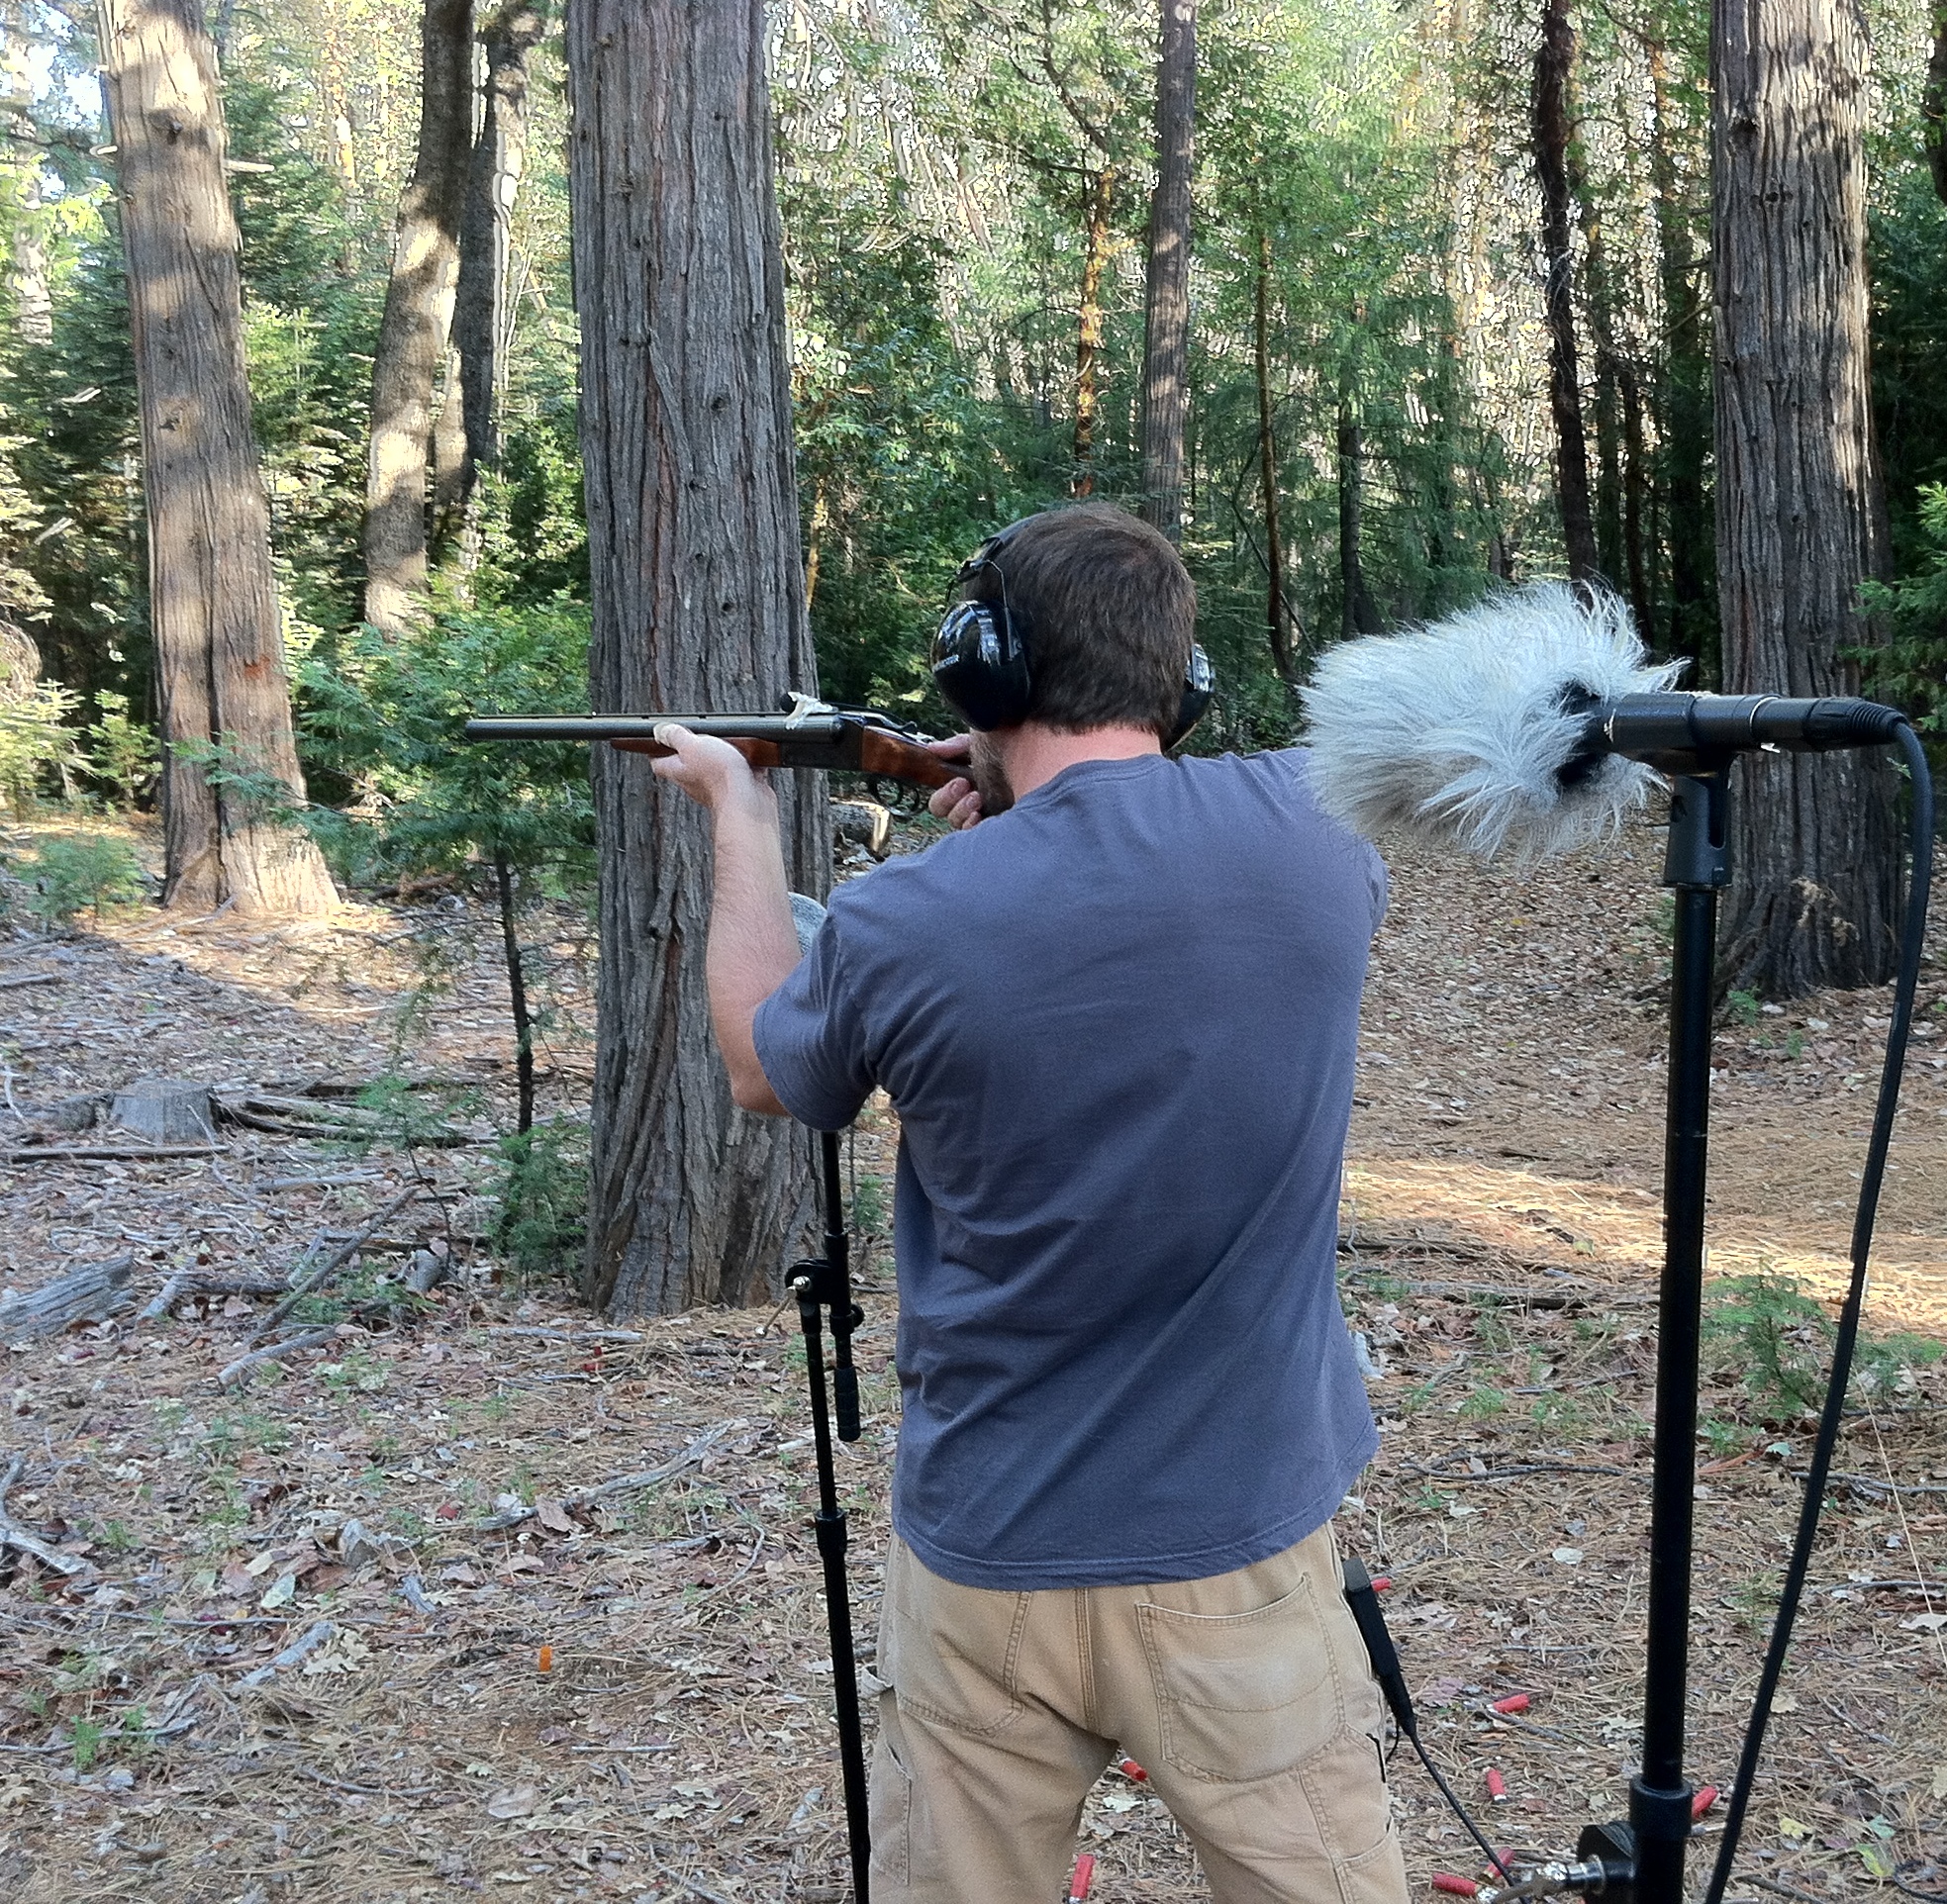
This is a double-barreled 12 gauge shotgun that we were able to record. It left bruises on both Adam’s and my shoulders the next day but it was definitely worth it.
Here is Adam shooting a 38. If you look closely you can see the tape holding the lav onto the gun.
Here is a good picture of the lav mic that we clipped (and taped) to the 12 gauge that Adam is shooting.